Emergency Preparedness for Small Apartments: 2026 Guide
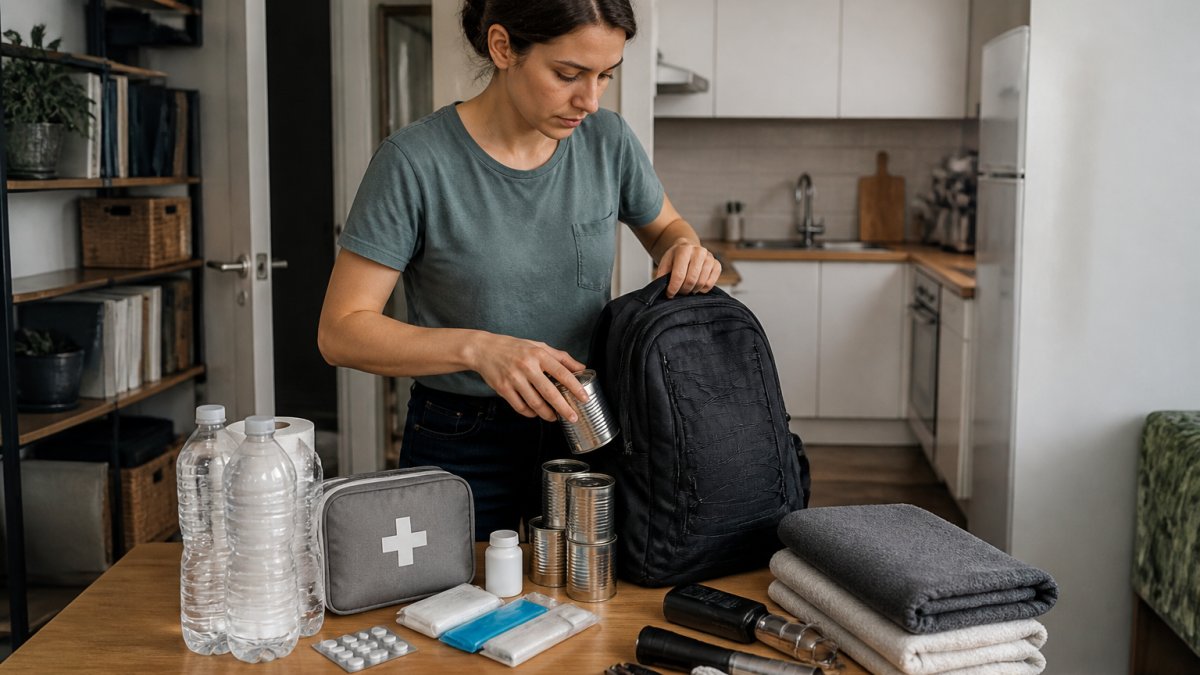
Table of Contents
- Why Apartment Preparedness Demands a Different Approach
- Build Your Apartment Emergency Kit in Layers
- Small-Space Emergency Storage That Actually Fits
- Emergency Food and Water Storage for Tight Kitchens
- Your Apartment Evacuation Plan: Shelter in Place vs. Leave
- Address Apartment-Specific Hazards and Building Systems
- Coordinate with Neighbors, Renters, and Property Management
- Maintain, Rotate, and Rehearse Your Plan
- Frequently Asked Questions
Last Updated: October 21, 2026
Why Apartment Preparedness Demands a Different Approach
Emergency preparedness for small apartments means building a workable disaster plan and supply kit inside a rental with limited storage, shared walls, and building systems you do not control.
Most standard checklists assume a house: fill the bathtub, stash supplies in the basement, chain a water barrel to a downspout. None of that maps onto a fourth-floor walk-up.
Here is how to fit a real kit into a small flat without losing a closet to it.
Build Your Apartment Emergency Kit in Layers
An apartment emergency kit works best in two layers: a 72-hour core kit that stays put and a grab-and-go bag that leaves with you. The core kit carries the bulk; the bag carries what you can physically move.
The 72-Hour Core Kit
The 72-hour core kit covers the first three days after a power outage, water shutoff, or building evacuation order, the common planning window in most household guidance, and enough time for utilities to restore or for you to relocate.
Pack it in a single lidded bin or a dedicated shelf. Here is what belongs inside:
- Water: your three-day drinking supply, plus a little for hygiene
- Food: ready-to-eat items that need no cooking and no fridge
- First-aid kit with bandages, antiseptic, and pain relief
- Personal medications, at least a week's worth in original packaging
The Grab-and-Go Bag
The grab-and-go bag is a backpack you can carry down four flights of stairs in the dark.
Load it with what you cannot replace in an hour: medications, ID copies, a charger, a light, cash, a change of clothes, and a compact first-aid pouch.
Check the bag every season. Rotate the food and swap the clothes when the weather turns.
Small-Space Emergency Storage That Actually Fits
Small-space emergency storage means using volume you already own rather than buying new furniture.
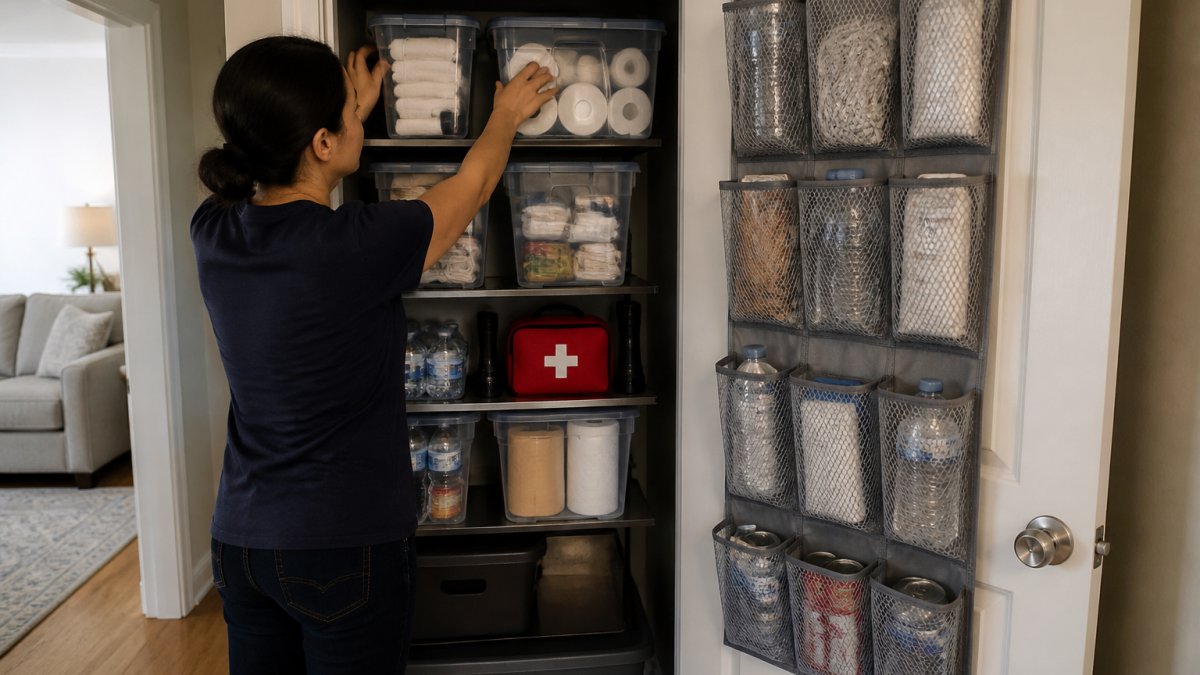
The biggest mistake we see is buying a huge plastic tub, filling it, then burying it under winter coats.
Vertical and Hidden Storage Ideas
Start with height. Most renters waste the top third of every closet. A few concrete moves:
- Stack two shallow bins instead of one deep bin so nothing sinks to the bottom
- Hang an over-the-door rack on the closet door for the grab-and-go bag and a flashlight
- Slide flat water pouches or a slim first-aid case under the bed
- Use the dead space behind a sofa or under a desk for a sealed food box
One more thing most guides miss: keep a flashlight and shoes beside the bed. In a night-time evacuation, broken glass on the floor is the first hazard, not the fire.
Emergency Food and Water Storage for Tight Kitchens
Emergency food and water storage in a small kitchen is a volume problem before it is a shopping problem. In a tight kitchen, buy compact, calorie-dense, shelf-stable items and store only what you will eat and can physically reach.
How Much Water and Food to Store
Water is the hard part in an apartment: you cannot store a bathtub's worth on a shelf, and a full bathtub is not reliable in most rentals.
- Count roughly one gallon per person per day as a working figure; a two-person flat needs about six gallons for drinking alone
- Store water in sealed, food-grade containers or pouches, not old milk jugs, which degrade and are hard to sanitise
- Choose stackable, rectangular containers over round bottles; they use shelf and under-bed space far more efficiently
- Keep a small water filter or purification tablets as backup for when stored water runs out or is contaminated
- For food, plan three days of no-cook meals per person, then add a few extra days of items you eat regularly
A useful sizing rule for a small kitchen: aim for one shelf or one shallow under-bed bin of food per person, not a full pantry. If it does not fit in the space you have assigned, it is not part of the kit.
Rotation and Shelf-Life Basics
Stock what you eat and eat what you stock. That single rule keeps the kit fresh and small, and separates a working supply from a cupboard of expired cans.
- Store the oldest items at the front and new purchases behind, so rotation happens naturally when you cook
- Write the purchase month on every package with a marker; a date on the lid is faster to read than a printed best-before code
- Do a quick pantry pull every six months and cook the items nearing expiry, then replace them on the next shop
- Replace water stores on the same six-month schedule, and check seals and lids for cracks
- Keep a small printed list taped inside the cupboard door showing what is in the kit and when it was last checked
Your Apartment Evacuation Plan: Shelter in Place vs. Leave
An apartment evacuation plan has two branches: stay put or get out.
Shelter in place when the danger is outside and the building is sound: severe storms, chemical releases, some civil emergencies.
Leave when the building itself is compromised. That means fire, gas smell, structural damage, or an official evacuation order.
Know two ways out of your unit and two ways out of the building.
Address Apartment-Specific Hazards and Building Systems
Apartment hazards differ from house hazards because you share systems with strangers. A neighbour's cooking fire, a burst riser pipe, or a building-wide power cut can hit without warning, and you often cannot fix the cause. Know your building's systems, know your shutoffs, and know which failures you can manage inside your unit versus which require you to leave.
Know Your Shutoffs and Building Systems
Find your shutoffs before you need them. Ask your building manager to walk you through the locations, then write them on a card and stick it inside a kitchen cupboard.
- Main water valve for your unit: usually under a kitchen or bathroom sink, or in a utility closet; know how to turn it clockwise to close
- Gas shutoff if you have a gas line: often at the meter or appliance connection; do not turn it back on yourself after closing it
- Electrical panel: know which breaker controls your unit, and keep a flashlight near it
- Fire alarm sound and pull stations: know what your building's alarm sounds like and where the nearest pull station is on your floor
- Stairwells: identify the nearest and the alternate stairwell, and confirm whether either is pressurized or smoke-protected
Map the Shared Risks
- Fire: know the alarm sound, the nearest stairwell, and whether your building has sprinklers; never use the lift during a fire alarm
- Water: a burst pipe above you can flood your unit; keep valuables off the floor, know how to shut off your supply, and report leaks to management immediately
- Power: a building outage can kill the lift, the heating, and the fridge at once; keep a headlamp by the bed and a power bank charged
- Heat and smoke: shared ventilation can carry smoke between units, so keep a dust mask in the kit and know how to seal gaps around your door with tape and a towel
- Building access: a power outage can lock electronic entry systems or strand you on an upper floor; carry a key that works without power and keep shoes by the bed
Decide: Shelter in Place or Leave
Use a simple decision rule. Shelter in place when the danger is outside and the building is sound: severe storms, chemical releases, and some civil emergencies. Close windows, seal gaps, and move to an interior room away from glass. Leave when the building itself is compromised: fire, gas smell, structural damage, or an official evacuation order. Take the grab-and-go bag, your keys, and your phone, use the stairs, and never the lift.
Coordinate with Neighbors, Renters, and Property Management
Renter coordination is the piece almost every guide skips. In a building, your safety depends partly on people you have never met.
Start with your property manager. Ask three questions: What is the building's emergency protocol? Where are the exits and assembly points?
Then build a light neighbour network. You do not need a committee.
- Swap phone numbers with your immediate neighbours
- Agree who checks on elderly or disabled residents on your floor
- Share a spare key with one trusted neighbour for emergencies only
- Note who has pets, medical needs, or young children
- Agree a meeting spot outside the building
That small network covers the gap between the alarm and the fire service.
Maintain, Rotate, and Rehearse Your Plan
A plan you never test is a plan you do not have. Maintenance is where most kits quietly fail, so put it on a calendar and keep it short.
Run a simple cycle:
| Task | How Often | Time Needed |
|---|---|---|
| Check flashlights and power bank | Monthly | 5 minutes |
| Rotate food and water stores | Every 6 months | 30 minutes |
| Review medications and documents | Every 6 months | 15 minutes |
| Walk both exit routes | Every 6 months | 10 minutes |
| Full kit inventory and restock | Yearly | 45 minutes |
Rehearse with everyone in your household. Practise leaving in the dark with the grab-and-go bag, time how long it takes to reach the stairwell, then fix whatever slowed you down.
If you want a structured starting point, the Ready.gov household emergency plan guidance walks through the basics, and the American Red Cross emergency preparedness resources covers kit contents and first aid. For building-specific fire safety, the National Fire Protection Association home safety guidance explains escape planning and smoke alarm checks.
Small apartments make preparedness feel impossible, but the constraint is space, not capability.
Frequently Asked Questions
What should apartment renters keep in an emergency kit?
At minimum, an apartment emergency kit should include drinking water, non-perishable food, a first-aid kit, personal medications, a flashlight with spare batteries, an emergency radio, a phone charger and backup battery, dust masks, and hygiene supplies. Renters should also keep copies of important documents and a small amount of cash. Because space is limited, choose multi-use items and store them in stackable bins or a designated emergency closet so they stay accessible. Review the kit every six months and replace expired items.
How do you store emergency supplies in a small apartment?
Use small-space emergency storage tactics: stack bins vertically, use under-bed containers, over-the-door racks, and the back of closets. Keep a grab-and-go bag near the exit. Choose compact packaging for food and water, and avoid buying in bulk unless you have a dedicated shelf. Label everything and keep a supply checklist taped inside the closet door. Rotate food and water on a schedule so nothing expires. The goal is accessible supplies without taking over your living area.
How do you prepare to evacuate an apartment quickly?
An apartment evacuation plan starts with knowing two exits, keeping a grab-and-go bag by the door, and practicing a route with your household. Decide on a meeting point outside the building. Keep shoes, a flashlight, and a jacket near the exit. If you have pets, store a leash and carrier nearby. Review your building's emergency exits and never use elevators during a fire. Practice the plan twice a year so everyone knows what to do without hesitation.
How much water should I store for an emergency?
Plan for at least one gallon of water per person per day for drinking and basic hygiene, and store a three-day supply at minimum. For a two-person apartment, that means about six gallons. If space is tight, use stackable water containers or water purification tablets as a backup. Store water in a cool, dark place and rotate it every six months. Remember to include water for pets. Emergency food and water storage should be checked together during your routine kit maintenance.